Updated 8/7/2024
A Lenovo BIOS update is important to keep your computer running smoothly. Sometimes they are released to fix bugs or improve performance, and other times they are released in response to a security issue.
Whatever the reason for the update, it’s important that you install it as soon as possible.
In this blog post, we will walk you through the process of performing a Lenovo BIOS update so that you can do it yourself quickly and easily.

Lenovo BIOS Update
Note: Be careful with any BIOS update, if the process is interrupted your computer could become frozen and corrupted.
There are a few ways to upgrade your Lenovo BIOS:
Lenovo BIOS Download
Note: You should use an administrator account to run the update file, and the machine will reboot to apply the update.
The BIOS Update Utility is simply a compressed file of all the BIOS update files needed to perform the update.
If you have a BIOS password set, you may need to clear or reset it if it has been forgotten.
Updating your Lenovo BIOS through the download method entails several detailed steps, which are crucial for ensuring a smooth and successful installation. Follow these carefully to minimize risk and maximize efficiency.
- Access the Lenovo Support Website
- Open a web browser on your computer and navigate to the Lenovo Support website. This platform provides crucial resources for your Lenovo devices, including BIOS updates.
- Identify Your Device
- In the search bar on the support homepage, enter the name or model number of your Lenovo computer. This information can generally be found on a sticker located on the bottom of the laptop or on the side of a desktop. Upon entering your model, press “Enter.”
- Navigate to Drivers & Software
- You will be redirected to the downloads page specific to your device. From here, look for the option labeled ‘Drivers & Software’ prominently displayed on the page. Select it to proceed to the necessary sections.
- Select Manual Update
- After selecting ‘Drivers & Software’, scroll down to locate the ‘Manual Update’ option. This will provide access to all available updates, including critical BIOS updates.
- Access BIOS/UEFI Updates
- Find the section labeled ‘BIOS/UEFI’ on the updates page. Click on this option to view the list of BIOS update packages available for your specific model.
- Download the BIOS Update Utility
- Within the BIOS/UEFI section, locate the ‘BIOS Update Utility’. This is the software required to perform the update. Click on the download link to start the downloading process. It’s advisable to also download the ‘Readme’ file associated with the update; this document contains important information and detailed instructions about the update process.
- Prepare for Installation
- Once the files are downloaded, navigate to your computer’s download location. You will find a compressed file containing all the necessary BIOS update files. Before proceeding, ensure that you are logged in with an administrator account, as this is necessary to run the update file.
- Run the BIOS Update Utility
- Double-click the downloaded BIOS Update Utility file to initiate the update process. Follow the on-screen instructions meticulously to ensure that each step is completed correctly. Pay close attention to any prompts that may require your confirmation.
- Reboot and Apply Update
- After the utility has finished running, your machine will prompt you to reboot. Confirm this action; the system will restart and automatically apply the BIOS update during the boot process. It is critical not to interrupt this process, as it could result in serious issues with your computer’s functionality.
By following these detailed steps, you can confidently execute a BIOS update for your Lenovo device, ensuring that it operates with the latest enhancements and security fixes.
Lenovo Vantage Utility
Lenovo Vantage is a utility that comes pre-installed on many Lenovo computers. It provides a quick way to access support, view system information, and perform maintenance tasks.
To update your BIOS using Lenovo Vantage:
- From Windows search for and select ‘Lenovo Vantage.’
- Click on the ‘System Update’ tab.
- Click the ‘Check For Updates’ button.
- Install all the updates shown or only the BIOS update.
- A prompt will inform you of a system reboot.
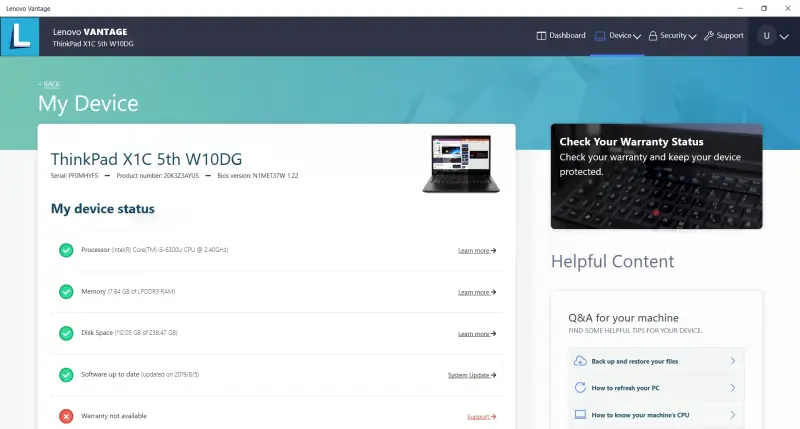
If needed, you can download Lenovo Vantage for your machine.
System Update Lenovo
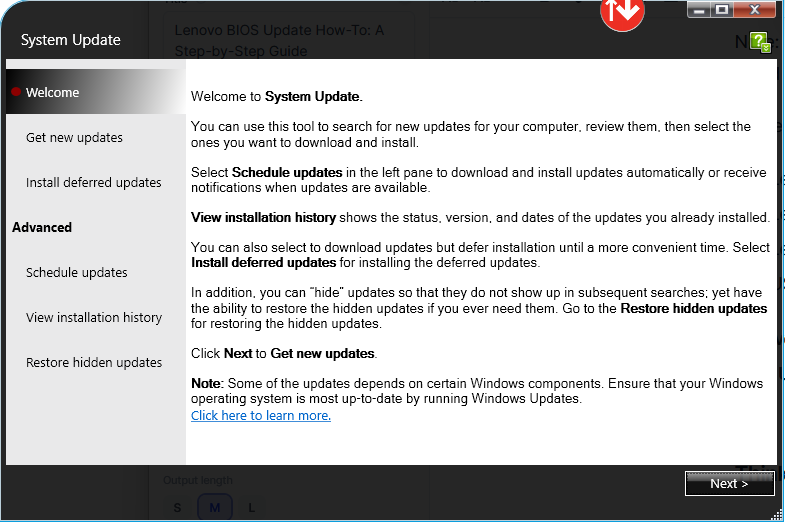
System Update is a utility on your Lenovo computer designed to search for and install updates specifically for your machine. You can download and install any new updates including a BIOS update immediately or schedule a time to apply the updates.
- From Windows, search for and select ‘System Update’.
- Select ‘Next’ to allow the utility to search for new updates.
- Either apply the updates right away or schedule a time to do so.
Some updates including a BIOS update will require your computer to reboot.
Also, see the Steps To Fix New SSD Drive Not Showing Up in the BIOS.
Updating BIOS via USB Flash Drive
This method is very similar to the BIOS Download update procedure above. The difference is that you download and extract the BIOS update files to your computer so you can then copy them to your USB thumb drive.
Utilizing a USB flash drive to update your BIOS can provide a reliable alternative, especially when the system needs upgrading without relying solely on software methods. Follow these comprehensive steps to ensure a successful BIOS update through a USB drive.
- Access the Lenovo Support Website
- Start by opening a web browser and navigating to the Lenovo Support website. This site is your primary resource for downloading vital updates for your Lenovo devices.
- Identify Your Device
- In the search bar on the support homepage, input your computer’s name or model number. This information can usually be found on a sticker located at the bottom of the laptop or the side of a desktop. Once you’ve entered your model, press “Enter” to proceed.
- Navigate to Drivers & Software
- From the results page, locate the section titled ‘Drivers & Software’ and select it. This will direct you to the download page pertinent to your device.
- Select Manual Update
- Scroll down until you find the ‘Manual Update’ option. Clicking this will grant you access to a range of available updates, including necessary BIOS updates.
- Access BIOS/UEFI Updates
- Look for the subsection labeled ‘BIOS/UEFI’ on the updates page. Click on this to reveal the available BIOS update packages tailored for your model.
- Download the BIOS Update Utility
- In the BIOS/UEFI section, identify the ‘BIOS Update Utility.’ This utility is essential for executing the update. Click on the download link to retrieve the file. Additionally, download the associated ‘Readme’ file, as it contains critical information and step-by-step instructions related to the update process.
- Extract BIOS Update Files
- Once downloaded, locate the file in your computer’s designated downloads folder. Double-click the downloaded file and select the option ‘Extract Only.’ Choose a location on your hard drive where you want to store the extracted files.
- Prepare Your USB Flash Drive
- Insert a formatted USB flash drive into your computer. If you are unsure how to format it, right-click on the drive in ‘My Computer’ or ‘This PC’, choose ‘Format’, select ‘FAT32’ as the file system, and proceed with the formatting process.
- Open Instructions for USB Installation
- Navigate to the folder where you extracted your BIOS update files and locate the document titled “Instructions US – BIOS Flash USB Memory Key.” Open this file for specific instructions on creating a BIOS flash USB drive.
- Create the BIOS Flash Drive
- In the instructions, there will be a script file named ‘mkusbkey.bat’ which needs to be executed to write the necessary BIOS files onto the USB drive. Open a command prompt with administrative rights (right-click on the Start menu and select ‘Command Prompt (Admin)’) and navigate to the folder where you extracted the files. Run the command `mkusbkey.bat` to initiate the process of creating your BIOS flash drive.
- Safely Eject the USB Drive
- Once the utility has finished running, ensure that you safely eject the USB drive from your computer. This step is crucial to prevent data corruption.
- Update the BIOS from the USB Drive
- Insert the USB flash drive into the target Lenovo computer that requires the BIOS update. Restart the computer and access the BIOS setup by pressing the designated key (usually F2, F10, or Delete) during the boot process. Within the BIOS menu, search for the ‘Flash BIOS’ or ‘BIOS Update’ option. Follow the on-screen prompts to select the USB drive and the BIOS update file to proceed with the installation.
Computer won’t boot after a BIOS update
If you have applied a Lenovo BIOS update and now your computer won’t boot, try the following.
- Unplug the power cord or AC adapter and any battery from the computer.
- On a laptop, press either the ‘reset’ button or the ‘NOVO’ button.
- Press and hold the power button for at least 10 seconds to attempt to drain any remaining power.
- Re-install the battery and power, then boot up the machine.
If the above steps did not fix your issue, try the BIOS initialization procedure.
- Press the power button to power on your computer and press ‘F1’ to boot into the BIOS/UEFI.
- Press the ‘F9’ key to load the default configuration on the computer.
- Confirm it and press ‘F10’ to save and reboot.
Lenovo Legion Memory Enhance BIOS
The Memory Enhance option in the BIOS of some Legion laptops can either be enabled or disabled. It is intended to improve or increase memory stability by adjusting the memory timings. It will improve the memory latency of your RAM for better performance.
Many users have noticed their memory speed decreased from 3200Mhz down to 2933Mhz when enabling the ‘memory enhance’ feature. This is most likely due to the use of XMP RAM which is not yet supported by Legion laptops.
You should run a couple of tests with this option enabled and disabled to find out which setting gives you the best performance.
ThinkPad BIOS Update
If you have a ThinkPad, the process is similar to the Lenovo BIOS update process above. The main difference is that you’ll need to download the ThinkPad BIOS update utility.
To update your BIOS using the ThinkPad BIOS update utility:
- Go to the Lenovo Support website.
- Type in the name or model of your Lenovo ThinkPad computer. This will take you to the downloads page for your device.
- Select ‘Drivers & Software’, then ‘Manual Update.’
- Click on ‘BIOS’ to see the available downloads.
- Download the ThinkPad BIOS update utility. Also, download the ‘Readme’ file for full details about the BIOS update.
- Run the utility to update the ThinkPad BIOS.
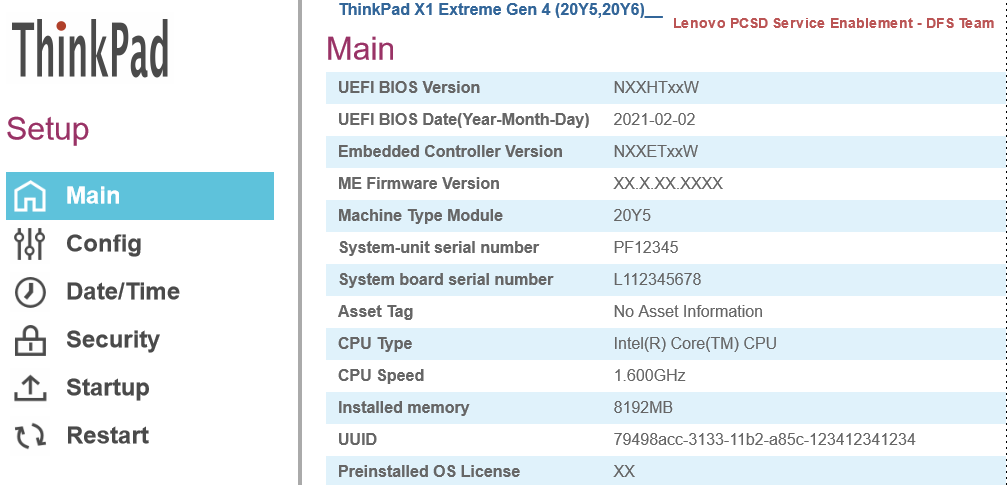
Lenovo BIOS Update Virus
Many users have seen a BIOS update prompt pop-up on their Lenovo computers and are wondering if it is a virus. If for any reason you are unsure of the authenticity of an update program, do not run it.
To be safe, visit the Lenovo support page to download a new BIOS update or use the Lenovo Vantage tool for all your updates. This will ensure you have a valid and safe BIOS update to apply to your system.
If you are still unsure, you can always contact Lenovo support for help.
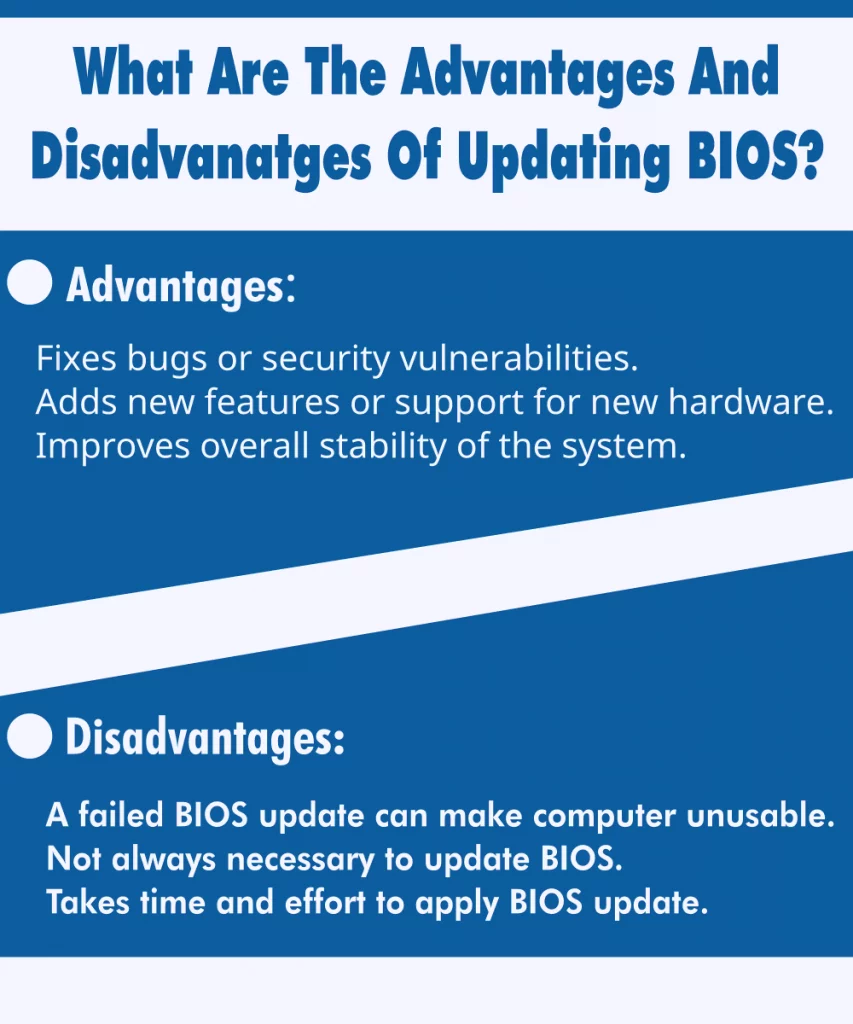
What are the advantages and disadvantages of updating your BIOS?
Advantages:
- Fixes bugs or security vulnerabilities.
- Adds new features or support for new hardware.
- Improves overall stability of the system.
Disadvantages:
- A failed BIOS update can render your computer unusable and require expensive repairs.
- It is not always necessary to update your BIOS, so be sure to check for updates only when recommended by the manufacturer.
- Applying a BIOS update takes time and effort, so be sure you really need it before proceeding.
If you do decide to update your BIOS, be sure to follow the instructions carefully and create a backup beforehand just in case something goes wrong. Lenovo provides clear and concise instructions.
- Best Laptops for AI and Machine LearningDiscover the top 5 laptops for AI and Machine Learning. We review high-performance machines perfect for deep learning, data science, and neural networks. Artificial Intelligence (AI) and Machine Learning (ML) are no longer futuristic concepts—they… Read more: Best Laptops for AI and Machine Learning
- Upgrading SSD Storage in the ThinkPad X9-15 Gen 1 Aura EditionUpgrading SSD Storage and Analyzing Memory in the ThinkPad X9-15 Gen 1 Aura Edition Upgrade Your ThinkPad X9-15 SSD Like a Pro: A Technical Guide The ThinkPad X9-15 Gen 1 Aura Edition (Machine Types 21Q6… Read more: Upgrading SSD Storage in the ThinkPad X9-15 Gen 1 Aura Edition
- How Quantum Computing Could Impact Everyday LaptopsQuantum computing may sound like science fiction, but its potential to revolutionize technology is very real. Unlike classical computing, which processes information using bits as 0s and 1s, quantum computing leverages the strange and exciting… Read more: How Quantum Computing Could Impact Everyday Laptops
- What Is The Difference Between Lenovo’s Pens? (with Part Numbers)Do you ever find yourself writing with an old-school pen or even worse a pencil? As you pry your fingers off that last-century writing device, ask yourself if there isn’t a better way. Well ask… Read more: What Is The Difference Between Lenovo’s Pens? (with Part Numbers)
- Legion 5 Laptop Upgrade Guide: Game Like a ProThis article serves as your ultimate guide to upgrading your Lenovo Legion 5 laptop with RAM and SSD, unlocking its potential to deliver unbeatable gaming performance. With over two decades of expertise in the tech… Read more: Legion 5 Laptop Upgrade Guide: Game Like a Pro
- How to Replace Your Laptop Battery: A Step-by-Step GuideLaptop battery not lasting as long? Replacement may be needed. Before we jump into the process, it is essential to mention that you will require some tools. You’ll need a screwdriver (or two), a new… Read more: How to Replace Your Laptop Battery: A Step-by-Step Guide

