Immediate Answer
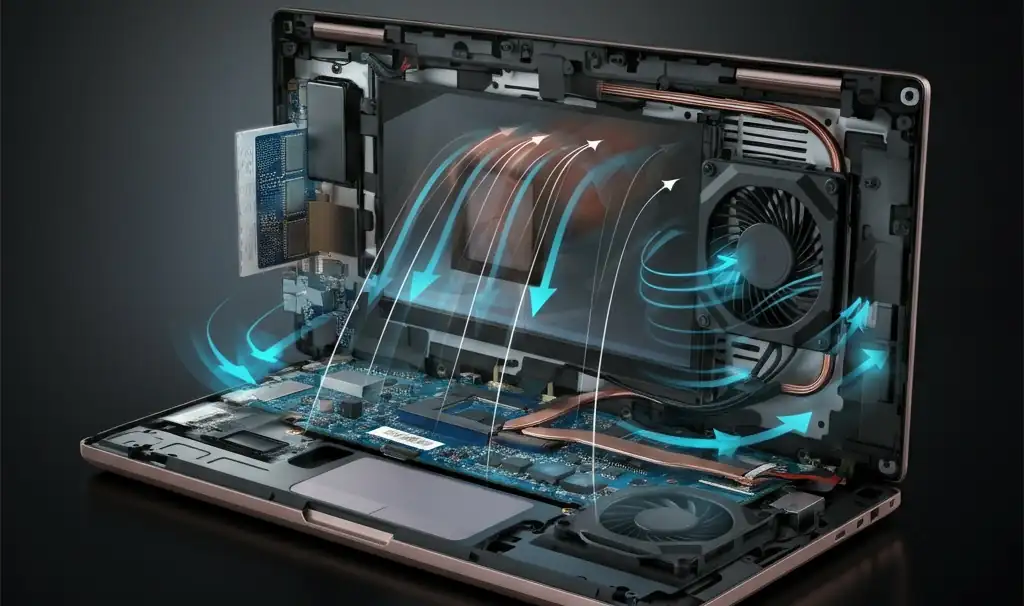
Gaming laptops naturally run hot due to their powerful components packed in a compact design. However, excessive heat can throttle performance, shorten the lifespan of your device, and even cause hardware failures.
To manage heat effectively, ensure proper airflow, clean internal components regularly, and, if needed, adjust system settings like undervolting or apply fresh thermal paste.
Quick Heat Management Tips:
- Regularly clean dust from fans and vents.
- Use a cooling pad for better airflow.
- Optimize in-game settings to reduce system load.
- Consider undervolting to lower power consumption and heat.
- Replace or reapply thermal paste for better heat transfer.
- Immediate Answer
- Follow-Up Questions:
- 1. How Does Excessive Heat Affect Gaming Laptops?
- 2. What Are the Common Causes of Overheating in Gaming Laptops?
- 3. Typical Temperature Ranges for Gaming Laptops
- 4. Simple Methods to Prevent Overheating
- 5. Advanced Heat Management Techniques
- 6. Step-by-Step Guide to Cleaning and Optimizing Airflow
- Frequently Asked Questions (FAQ) About Gaming Laptop Heat Management
- Real-Life Examples of Overheating Issues in Gaming Laptops
- Final Thoughts
Follow-Up Questions:
1. How Does Excessive Heat Affect Gaming Laptops?
Excessive heat impacts your gaming laptop in multiple ways:
- Performance Throttling: When the CPU or GPU gets too hot, the system reduces their performance to prevent damage. This is known as thermal throttling and can cause lag or stuttering in games.
- Reduced Lifespan: Consistently high temperatures degrade components like the motherboard, battery, and storage, leading to premature failure.
- System Crashes: Overheating can cause your laptop to shut down unexpectedly to protect its internal components.
- Physical Damage: Extreme temperatures can warp or damage delicate parts like solder joints or capacitors.
Example: A laptop running at 95°C regularly will throttle its CPU, causing FPS drops, and may experience hardware failure within a few years.

2. What Are the Common Causes of Overheating in Gaming Laptops?
Ever had your laptop transform into a frying pan during a gaming session? You’re not alone. Overheating is a common issue, and understanding why it happens can be a game-changer—literally.
Let’s break it down.
1. Clogged Fans and Dusty Vents
Picture this: you finally sit down to play your favorite game, but within minutes, your laptop sounds like a jet engine.
That noise? It’s your fans working overtime.
Over time, dust and debris build up in your laptop’s vents and fans, choking the airflow. Think of it as trying to breathe through a straw—your laptop is struggling just as much.
Cleaning those fans and vents regularly can work wonders, and no, you don’t need to be a tech wizard to do it!
2. Poor Ventilation
Ever laid your laptop on a soft, cozy blanket while gaming? Sure, it’s comfy, but you’re smothering those cooling vents.
Gaming laptops are like athletes—they need room to breathe! Placing your laptop on a hard, flat surface or investing in a cooling pad is like giving it a front-row seat to fresh air. It’s a small change that makes a big difference.
3. Outdated Thermal Paste
Thermal paste isn’t exactly the kind of thing you think about daily—it’s not glamorous, but it’s crucial.
Over time, the paste between your CPU or GPU and its heat sink can dry out, losing its ability to transfer heat effectively. Imagine smearing sunscreen on your skin, but it’s all dried up—would it still work?
Same idea here. Fresh thermal paste can be a lifesaver for your laptop’s temperature.
4. Overclocking Gone Wrong
Overclocking might feel like turning your laptop into a racecar, but if you’re not careful, it can also turn it into a toaster.
Pushing your hardware beyond its limits generates more heat than your system can handle. If overclocking is your thing, make sure you’ve got the cooling systems to back it up.
Otherwise, you’re just asking for trouble—and sizzling temperatures.
5. Background Programs Hogging Resources
Ever notice your laptop heating up even when you’re not playing a game? It might be a sneaky program running in the background, gobbling up resources.
Think of it like leaving the oven on when you’re not cooking—it’s unnecessary and wastes energy.
Doing a quick check for background hogs in your task manager can help avoid extra heat and frustration.
6. Ambient Temperature
Is your gaming setup in a room that could double as a sauna? Your laptop feels that too. Higher room temperatures mean your system has to work harder to cool itself.
A fan or AC can go a long way in creating a happier, cooler environment—not just for you, but for your laptop too.
7. Aging Hardware
Sometimes, it’s not you or your setup; it’s just your laptop showing its age. Older hardware can struggle to keep up with newer games, generating more heat as it tries to keep up with demanding tasks.
It’s like forcing an old car to run at top speed—it’s not going to end well. Regular maintenance can help, but sometimes an upgrade is the ultimate solution.
Now that you know the common culprits, which one do you think is turning up the heat on your gaming sessions? Whatever it is, don’t sweat it—every issue has a fix. Your laptop just needs a little TLC (and maybe some compressed air).
Pro Tip: Monitor your laptop’s temperature regularly using tools like HWMonitor or MSI Afterburner.
3. Typical Temperature Ranges for Gaming Laptops
It’s crucial to know what temperatures are normal for your gaming laptop. Below is a chart to provide some context:
| Component | Idle Temp (°C) | Load Temp (°C) | Danger Zone (°C) |
|---|---|---|---|
| CPU | 40-50 | 70-90 | 95+ |
| GPU | 35-45 | 70-85 | 90+ |
| Hard Drive (HDD) | 25-35 | 40-60 | 70+ |
| Solid-State Drive (SSD) | 30-45 | 50-70 | 80+ |
If your laptop operates in the “Danger Zone” frequently, consider implementing the strategies below.

4. Simple Methods to Prevent Overheating
The following easy-to-apply methods can help keep your laptop cool:
Clean Fans and Vents
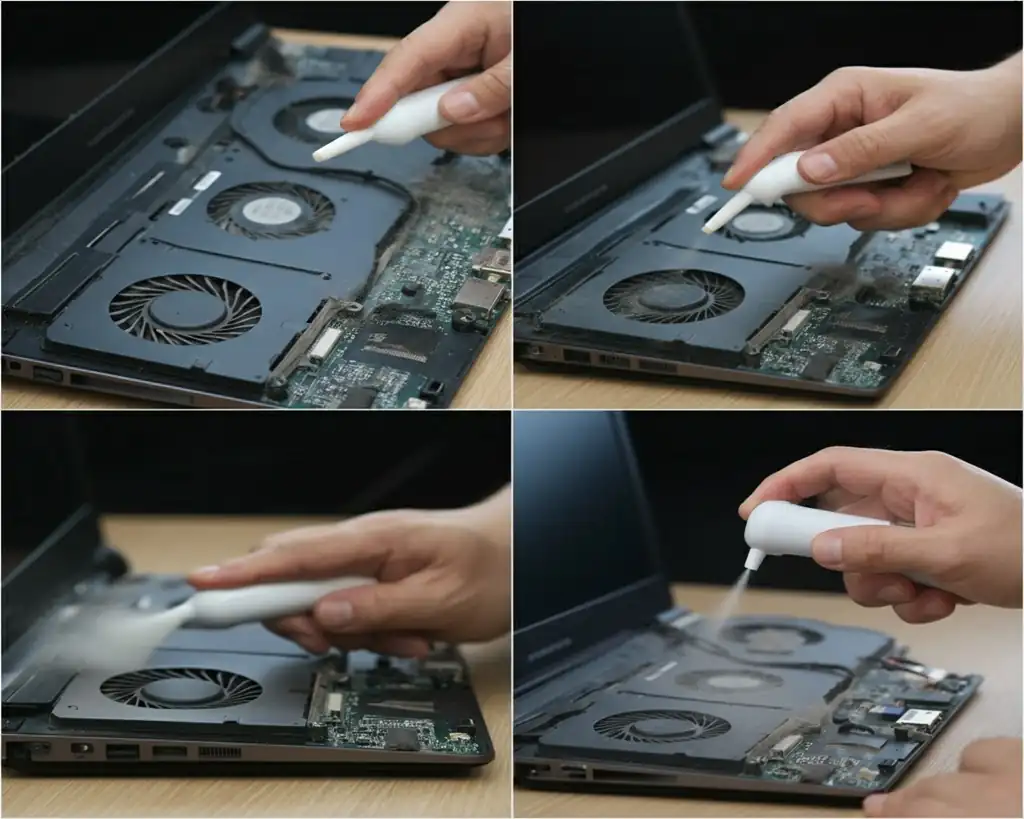
- Remove dust using compressed air or a soft brush.
- Ensure vents are not blocked when gaming.
Use a Cooling Pad
- A cooling pad provides extra airflow and lowers surface temperatures.
Avoid Playing on Soft Surfaces
- Always use a flat, hard surface when gaming to avoid blocking vents.
Lower Graphics Settings
- Reducing resolution or turning off advanced options like ray tracing can significantly cut heat output.
Update Drivers and BIOS
- Outdated software can cause your laptop to overwork unnecessarily.
Close Background Applications
- Freeing up resources reduces CPU/GPU usage and heat.
Tip: Gaming in a cool, air-conditioned environment will further support heat dissipation.
5. Advanced Heat Management Techniques
Once you’ve mastered the basics, consider these advanced strategies:
1. Undervolting
Undervolting is a technique that involves reducing the voltage supplied to your CPU or GPU, which can significantly lower heat generation without compromising performance.
In some cases, it can even lead to improved performance by preventing thermal throttling. This technique also often results in increased battery life, as the components consume less power.
How-To:
- Use tools like Intel XTU (for Intel CPUs) or Throttlestop.
- Test stability and gradually lower the voltage in small increments.
Also Read: Lenovo Legion Performance Tech Explored: Next-Level Gaming Experience
How to Undervolt:
Undervolting is typically done using specialized software, and the process may vary depending on your laptop model and components. Here’s a general guide using Throttlestop, a popular undervolting software:
- Download and Install Throttlestop: Download Throttlestop from a reputable source and install it on your laptop.
- Open Throttlestop and Access FIVR: Launch Throttlestop and click on the “FIVR” button. This will open the “CPU Core/Cache Voltage Control” window.
- Reduce the Offset Voltage: In the “Offset Voltage” section, you will see the current voltage settings for your CPU core and cache. To undervolt, start by reducing the offset voltage by small increments, such as -10mV or -20mV.
- Apply and Test Stability: Click “Apply” to implement the changes. It’s crucial to test the stability of your system after each undervolt. Run a stress test using a tool like Prime95 or AIDA64 to check for errors or crashes.
- Gradually Undervolt Further: If your system remains stable, you can continue to reduce the offset voltage in small increments, testing stability after each change. The optimal undervolt will vary depending on your specific CPU and laptop.
- Monitor Temperatures: While undervolting, closely monitor your CPU temperatures using a monitoring tool like HWMonitor to ensure they remain within safe limits.
Important Considerations:
- Backup Your System: Before undervolting, back up your important data to prevent potential data loss in case of unexpected issues.
- Start Small: Begin with small voltage reductions and gradually decrease until you find the sweet spot for your system.
- Test Thoroughly: Stress test your system after each undervolt to ensure stability and prevent crashes.
- Monitor Temperatures: Keep an eye on your CPU temperatures while gaming and adjust the undervolt if needed.
- Consult Resources: Refer to online resources, forums, or communities specific to your laptop model for guidance and recommended undervolt settings.
Undervolting can be a safe and effective way to reduce heat and improve the performance of your gaming laptop. However, it’s important to approach the process cautiously and follow recommended practices to avoid potential issues. If you are unsure about any steps or encounter problems, seeking guidance from experienced users or professionals is recommended.
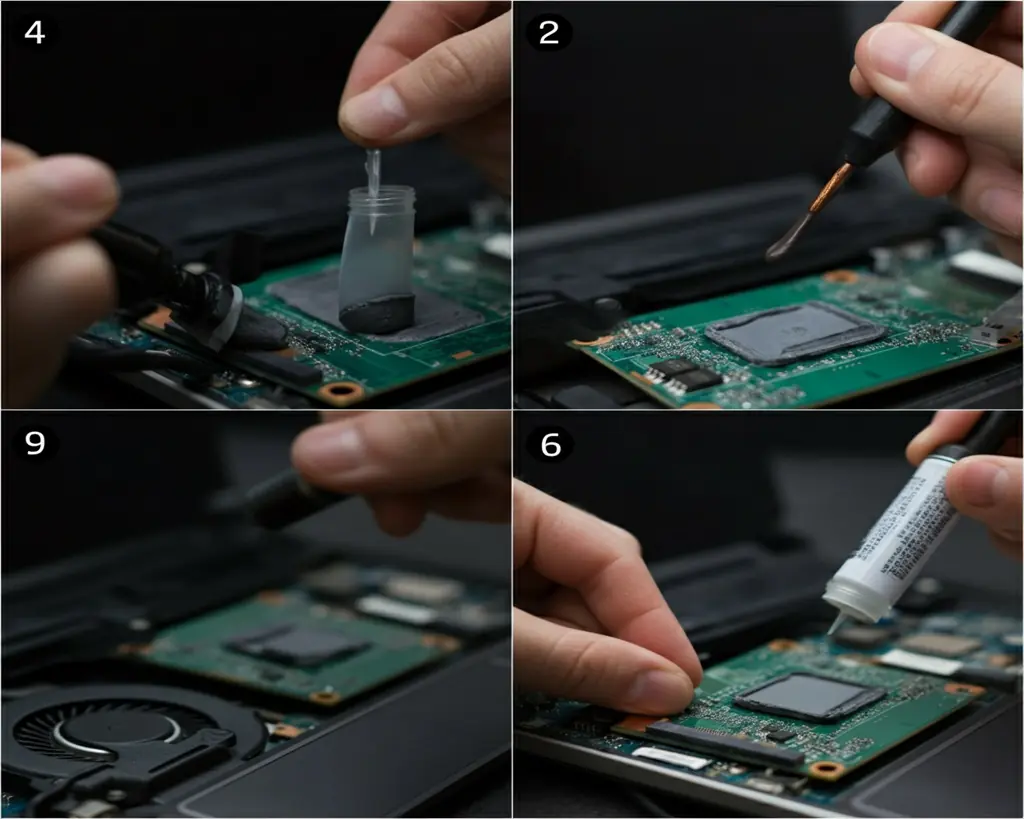
2. Reapplying Thermal Paste
Thermal paste is a crucial component in your laptop’s cooling system, as it helps transfer heat efficiently from the CPU and GPU to the heatsink. Over time, thermal paste can dry out and lose its effectiveness, leading to increased temperatures. Replacing old thermal paste with fresh paste can significantly improve heat transfer and lower component temperatures.
- Materials Needed:
- Thermal paste (e.g., Arctic MX-4).
- Isopropyl alcohol (90% or higher).
- Non-abrasive cloth or cotton swabs.
Choosing the Right Thermal Paste:
There are many different types of thermal paste available, each with varying performance characteristics. Some popular options include:
- Thermal Grizzly Kryonaut: This paste is known for its high thermal conductivity and is often considered a top performer. It’s a good choice for users seeking maximum cooling performance.
- Noctua NT-H2: This paste offers a good balance of performance and ease of application. It’s known for its long lifespan and relatively low pump-out rate.
- Arctic MX-4: Another popular choice, Arctic MX-4 offers excellent thermal conductivity and is easy to apply. It’s a good all-around option for most users.
- IC Diamond: This paste contains diamond dust, providing very high thermal conductivity. It’s a good choice for experienced users seeking the best possible cooling, but it requires careful application due to the abrasive nature of diamond dust.
When selecting a thermal paste, consider factors like thermal conductivity, viscosity, longevity, and ease of application.
How to Reapply Thermal Paste:
Reapplying thermal paste requires careful handling and precision. Here’s a general guide:
- Preparation: Gather the necessary materials, including thermal paste, isopropyl alcohol (90% or higher), a non-abrasive cloth or cotton swabs, a small screwdriver set, and an anti-static wrist strap.
- Power Down and Access Internals: Shut down your laptop, unplug the power adapter, and remove the battery. Then, carefully open the back panel using the appropriate screwdriver.
- Remove Heatsink and Clean: Locate the CPU and GPU heatsink, and carefully remove the screws holding it in place. Gently lift the heatsink and clean the old thermal paste from both the heatsink and the CPU/GPU surfaces using isopropyl alcohol and a lint-free cloth or cotton swabs.
- Apply Fresh Thermal Paste: Apply a small amount of fresh thermal paste to the center of the CPU and GPU. The amount should be roughly the size of a grain of rice. Avoid using too much paste, as it can negatively impact heat transfer.
- Reassemble and Test: Carefully place the heatsink back onto the CPU and GPU, ensuring it sits flush. Secure the heatsink screws, making sure they are evenly tightened. Reassemble the back panel, connect the battery and power adapter, and power on your laptop. Monitor the temperatures under load to ensure the new thermal paste is effectively transferring heat.
Tips and Precautions:
- Work in a Clean Environment: Reapplying thermal paste should be done in a clean, dust-free environment to prevent contaminants from getting trapped between the heatsink and components.
- Ground Yourself: Use an anti-static wrist strap to prevent static discharge, which can damage sensitive components.
- Avoid Spreading: Do not spread the thermal paste manually. The pressure from the heatsink will evenly distribute it.
- Consult Resources: Refer to online guides, tutorials, or videos specific to your laptop model for detailed instructions and visual guidance.
Reapplying thermal paste can be a relatively straightforward process, but it’s essential to approach it with care and attention to detail. Doing so can significantly improve your laptop’s cooling performance and prevent potential overheating issues. If you are unsure about any steps or uncomfortable with the process, seeking assistance from experienced users or professionals is highly recommended.
3. Repasting with Liquid Metal
For enthusiasts, liquid metal can provide better cooling than traditional paste, but it requires careful application to avoid damage.
Warning: This isn’t recommended for beginners as improper handling can short-circuit components.
4. External GPU Dock
Offloading GPU tasks to an external unit via Thunderbolt can reduce heat output significantly.

6. Step-by-Step Guide to Cleaning and Optimizing Airflow
Here’s a detailed guide to clean and optimize your laptop:
Tools You’ll Need
- Compressed air can.
- Screwdriver set.
- Brush with soft bristles.
- Anti-static wrist strap.
I have a whole article on this: 8 Pro Tips To Clean And Repair A Laptop Fan
Steps:
- Turn Off and Unplug the Laptop
- Ensure no power is flowing to avoid damage.
- Access the Internals
- Remove screws and open the back panel with care.
- Dusting the Fans
- Blow compressed air into the fan vents to dislodge dust.
- Use a soft brush to clean between the blades.
- Clean the Heatsinks
- Spray compressed air across the heatsink fins to clear debris.
- Inspect Air Vents
- Ensure nothing obstructs the intake or exhaust vents.
- Reassemble and Test
- Replace the back panel, power on, and monitor temperatures under load.
Tip: Do this every 4-6 months for optimal performance.
Frequently Asked Questions (FAQ) About Gaming Laptop Heat Management
1. How often should I clean my gaming laptop?
You should clean your gaming laptop every 4-6 months to remove dust and debris from fans, vents, and other components. If you use your laptop in a dusty environment or notice higher temperatures, clean it more frequently.
2. What is the best cooling pad for gaming laptops?
The best cooling pad for your laptop depends on its size and design. Look for a cooling pad with multiple high-speed fans, adjustable height settings, and a sturdy build. Popular options include the Cooler Master Notepal series and the Klim Wind.
3. Can software help manage heat?
Yes, software can assist in monitoring and managing heat. Tools like MSI Afterburner, HWMonitor, and SpeedFan allow you to track component temperatures and adjust fan speeds. Some manufacturers also provide proprietary software for better thermal management.
4. How do I know if my laptop is overheating?
Common signs of overheating include:
- Excessive fan noise.
- Reduced performance during gaming (frame rate drops or stuttering).
- Sudden shutdowns or restarts.
- Surface temperatures that feel unusually hot to the touch.
5. What are the signs of thermal throttling?
Thermal throttling occurs when the CPU or GPU reduces its performance to prevent damage from overheating. Signs include:
- Significant drops in frame rates during gameplay.
- Lowered clock speeds reported by monitoring software.
- Sluggish system performance even when running lighter tasks.
If you suspect overheating or throttling, monitor your device with software like HWMonitor and consider implementing the heat management techniques outlined in this guide.
Real-Life Examples of Overheating Issues in Gaming Laptops
Example 1: Sudden Shutdown During Gaming Sessions
Mark, an avid gamer, noticed his laptop would shut down abruptly during intense gaming marathons. The issue typically occurred during graphically demanding moments, such as large-scale battles in open-world RPGs. After some troubleshooting, he discovered that dust buildup in the cooling fans and vents severely restricted airflow, causing the CPU and GPU to heat beyond safe levels.
Resolution: Mark resolved the issue by cleaning the fans and vents using compressed air. He also invested in a cooling pad to help dissipate heat more efficiently during long gaming sessions. With these adjustments, the shutdowns stopped, and he could comfortably game without interruptions.
Example 2: Performance Drops Due to Thermal Throttling
Sophia, a competitive eSports player, noticed her laptop’s frame rates dropped significantly during critical moments in matches. Initially, she thought this was due to poor graphics settings, but upon monitoring her laptop with HWMonitor, she found the CPU and GPU were throttling to prevent damage from overheating.
Cause: The laptop’s thermal paste had degraded over time, reducing heat transfer between the components and the cooling system.
Resolution: Sophia re-applied high-quality thermal paste to the CPU and GPU. This restored optimal thermal contact and reduced component temperatures, which eliminated the throttling. Combined with using a well-ventilated space while gaming, her laptop’s performance became consistent and reliable.
Example 3: Long-Term Damage from Consistent Overheating
Jake, a casual gamer, ignored the warning signs of overheating—frequent fan noise, sluggish performance, and hot surface temperatures. Over time, his laptop’s motherboard suffered irreversible damage, resulting in expensive repairs. The root cause was a poorly designed thermal solution within his laptop, compounded by a lack of routine maintenance.
Prevention Strategy: If Jake had cleaned his fans regularly, removed dust from vents, and used software like MSI Afterburner to monitor temperatures, he could have avoided long-term damage. Replacing the stock thermal paste with a higher-quality alternative might also have mitigated the heating problem. This highlights the importance of proactive heat management.
Lessons Learned
- Regular maintenance, like cleaning vents and fans, can prevent sudden shutdowns.
- Recognizing symptoms of thermal throttling and addressing them promptly can save your laptop from performance issues.
- Ignoring heat problems can lead to costly repairs or irreversible hardware damage.
By sharing these real-life examples, we aim to show the importance of addressing overheating issues early and implementing the strategies discussed in this guide. Prevention is always more cost-effective and less stressful than dealing with broken hardware!
Final Thoughts
Managing heat in a gaming laptop is essential not only for performance but also for the longevity of your expensive gear. By following the tips and strategies outlined above, you can ensure smoother gaming sessions, fewer crashes, and an extended lifespan for your laptop.

J.S. is the owner, content creator, and editor at Upgrades-and-Options.com. I’ve worked in the IT and Computer Support field for over 20 years. The server hardware in my computer labs has mostly been IBM, but I’ve supported Dell, HP, and various other hardware. In addition, as part of my lab administrator responsibilities, I’ve learned, supported, and repaired/upgraded network hardware such as Cisco routers and switches. READ FULL BIO >>


