
Looking to enhance the performance of your Legion Slim 5 16IRH8? Upgrading the RAM and SSD can unleash quicker speeds, seamless multitasking, and an enhanced user experience.
This beginner-friendly guide will lead you through the process methodically, offering valuable tips and guidance along the way.
- Understanding Legion Slim 5 Compatibility: The First Step
- Preparing for the Upgrade: Your Safety Checklist
- Legion Slim 5 16IRH8 RAM Upgrade Process
- Legion Slim 5 16IRH8 SSD Upgrade Process
- Additional Resources:
- Verifying Current Memory: A Guide
- Post-Upgrade Actions
- Troubleshooting Common Issues
- Avoiding Potential Risks
- Accessing the UEFI/BIOS Utility
THIS POST MAY CONTAIN AFFILIATE LINKS. As an Amazon Associate, I earn from qualifying purchases. PLEASE READ MY DISCLOSURE FOR MORE INFO.
Understanding Legion Slim 5 Compatibility: The First Step
Before we dive into the upgrades, it’s critical to ensure that the components you choose are fully compatible with your Legion Slim 5 16IRH8.
RAM Specifications:
- Maximum Memory Capacity: Up to 32GB DDR5-5200. Two DDR5 SO-DIMM slots, dual-channel capable.
- Supported Memory Type: DDR5 SODIMM, with speeds of 5200.
- Module Sizes: Varying sizes up to 32GB are supported. 8GB (1 x 8GB) / 16GB (2 x 8GB) / 32 GB (2 x 16GB).
SSD Specifications:
- Supported Types: M.2 2280 SSD up to 1TB. Two M.2 2280 PCIe 4.0 x4 slots.
- Sizes: PCIe SSD (Gen4): 512GB / 1TB.
Preparing for the Upgrade: Your Safety Checklist
Attempting any hardware upgrades mandates adherence to safety procedures to safeguard both you and your device.
- Internal Power: Ensure the laptop’s internal power is entirely disabled to prevent damage or shocks.
- Necessary Tools: Precision screwdrivers suitable for your laptop, along with anti-static wristbands or mats, are essential for a smooth operation.
Legion Slim 5 16IRH8 RAM Upgrade Process
Tools Required:
- Precision Screwdriver Set
- Anti-static Wrist Strap
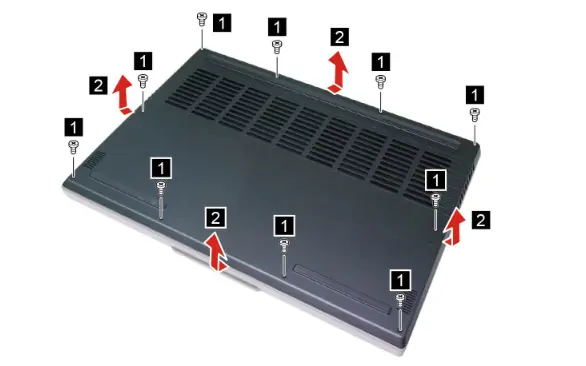
1. Remove the lower case:
Make sure the computer has been shut down before servicing the computer.
- Step 1. Place your laptop upside down on a flat surface.
- Step 2. Remove the ten screws. Pry up the latches and then remove the lower case.
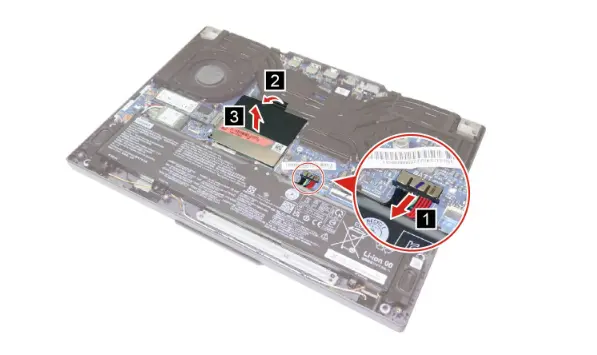
2. Remove the memory shielding and memory modules:
- Step 1. Disconnect the battery pack cable from the system board. Peel off the tape.
Attention: Use your fingernail to pull the connector to unplug it. Do not pull the cable
- Step 2. Locate the SO-DIMM slot for RAM. You will have to remove the memory module shielding covering the RAM.
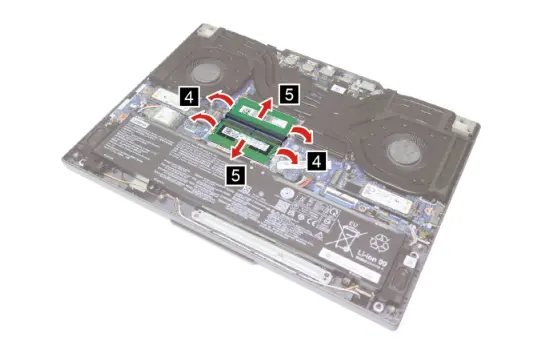
- Step 3. Remove existing RAM: Open the latches on both sides of the memory module slot at the same time, and then remove the memory module.
- Step 4. Hold the new RAM module by the edges, aligning it with the notch in the slot. Gently but firmly press down until it clicks into place.
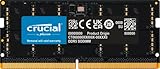
- Crucial RAM 32GB DDR5 5600. Amazon Page.
3. Reassemble:
- Put the back cover back on and screw it tightly, but avoid overtightening.
- Restart your Legion Slim 5, and you’re good to go!
Legion Slim 5 16IRH8 SSD Upgrade Process
Tools Required:
- Precision Screwdriver Set
- Anti-static Wrist Strap
1. Remove the lower case:
Make sure the computer has been shut down before servicing the computer.
- Step 1. Place your laptop upside down on a flat surface.
- Step 2. Remove the ten screws. Pry up the latches and then remove the lower case.
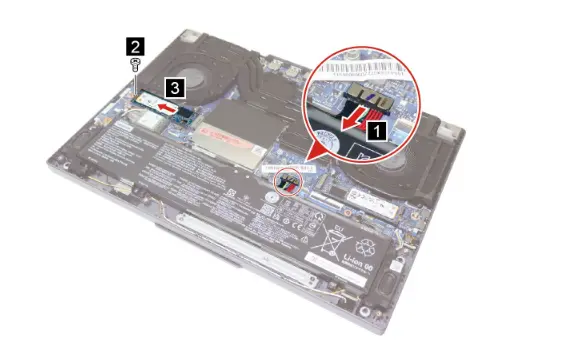
2. Locate the M.2 SSD Slots:
- With the back cover removed, locate the two M.2 SSD slots. One is on the right side, the other on the left side.
- Install the New SSD: Carefully hold the SSD by the edges and gently insert it into the chosen slot, ensuring it’s aligned correctly. Push down until it clicks securely into place.
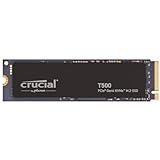
- Crucial T500 1TB Gen4 NVMe M.2. Amazon Page.
3. Reassemble:
- Put the back cover back on and screw it tightly, but avoid overtightening.
- Restart your Legion, and you’re good to go!
Essential Tips for a Successful SSD Upgrade
- Data Backup: Ensure all your important files are backed up before proceeding with the SSD installation. This safeguards against any potential data loss during the upgrade.
- Handling the SSD: Always hold the SSD by the edges to prevent damage from static electricity or oils from your fingers. Make sure to handle the SSD carefully to maintain its integrity.
- Avoiding Pressure: Do not exert force on the SSD. Excessive pressure can damage the delicate components and lead to hardware failure.
- Shock Absorption: When not installed, place the SSD on a padded or soft surface such as a piece of cloth or foam. This practice helps to minimize the risk of shock or vibration that could compromise the SSD’s functionality.
Additional Resources:
- Legion Slim 5 16IRH8 User Guide from Lenovo.
- Crucial RAM 32GB DDR5 5600. Amazon Page.
- Crucial T500 1TB Gen4 NVMe M.2. Amazon Page.
- What is a Solid-State Drive (SSD). My article.
As an Amazon Associate, I earn from qualifying purchases at no cost to you.
Verifying Current Memory: A Guide
Before upgrading your memory, it’s important to identify the existing memory in your laptop and check for available slots. Here’s how you can check for empty slots:
To access more details about empty memory slots:
- Search for Task Manager and open it.
- Navigate to the Performance tab and locate Memory to view the information on the Slots used.
Post-Upgrade Actions
After completing the upgrades, it’s crucial to check that your system boots properly and recognizes the new hardware. If everything is working correctly, it’s recommended to update your system’s BIOS and drivers to ensure optimal performance.
Troubleshooting Common Issues
If you encounter any problems during or after the upgrade, don’t panic. Here are some common issues and their solutions:
- BIOS Not Recognizing RAM: Double-check that the RAM is inserted correctly. If it still isn’t recognized, try swapping the RAM modules in their slots.
- SSD Not Recognized: Make sure the SSD is securely inserted into its slot. If it still isn’t recognized, check for any loose connections and reseat the SSD.
Avoiding Potential Risks
Upgrading hardware poses risks such as static damage or incorrect installation. Mitigate these by strictly following guidelines and using protective gear.
- Always backup critical data before undertaking any hardware modifications.
Accessing the UEFI/BIOS Utility
After upgrading your SSD or RAM, you might need to enter the UEFI/BIOS to configure boot settings or verify hardware detection. Here’s how:
- When the logo screen is displayed, repeatedly press and release the F2 key. The main screen of the UEFI diagnostic program is displayed.
- Navigate and Configure: Once in the UEFI/BIOS, use the arrow keys and Enter key to navigate and make any necessary changes.
Remember: Modifying settings in the UEFI/BIOS can impact your system’s stability. Only change settings you understand and are confident in. If unsure, consult your user manual or seek professional help.
- Upgrading SSD Storage in the ThinkPad X9-15 Gen 1 Aura Edition
- Legion 5 Laptop Upgrade Guide: Game Like a Pro
- IdeaPad Gaming 3 Upgrade (Full Specs)
- Lenovo LOQ 15IRX9 RAM and SSD Upgrade
- Level Up: 10 Hacks to Boost Laptop Speed

J.S. is the owner, content creator, and editor at Upgrades-and-Options.com. I’ve worked in the IT and Computer Support field for over 20 years. The server hardware in my computer labs has mostly been IBM, but I’ve supported Dell, HP, and various other hardware. In addition, as part of my lab administrator responsibilities, I’ve learned, supported, and repaired/upgraded network hardware such as Cisco routers and switches. READ FULL BIO >>
